
Rewrites: February 2019


Set in the Star Trek universe, the film stars Kate Vernon, Tony Todd, Richard Hatch, Gary Graham, and J. G. Hertzler, in a documentary-style film recounting the events surrounding the Battle of Axanar, a major clash between the Federation and the Klingons."
Sadly, the film company that was making the videos was served with a Cease & Desist Order from Paramount and CBS. This put the fate of everything in limbo for quite some time. The film company apparently has made some progress with the greedy networks and is promising to continue their work.

Photo Credit: Axanar Productions
Star Trek: Axanar - Prelude to Axanar - Trailer = CLICK HERE
Star Trek: Axanar - Prelude to Axanar = CLICK HERE
One of the Kickstarter perks is that you could buy a beautiful resin model of the hero ship from the video.

Unfortunately, the scale was too big and to expensive for my collecting tastes and I planned to build one myself. Then around the fall of 2014, the Star Trek Modelers Group page on FaceBook in conjunction with the Star Trek: Axanar people, held a contest for individuals to build their own version of the ship. This finally motivated me to give it a try in 1:2500 scale.
In the end, I built two models. The first one came out pretty decent, HOWEVER, I had a feeling that if I gave it another go, using what I had leaned the first time around, I could improve the final product.
USS Ares (NCC-1650)
Ares Class
1:2500 Scale AMT Kitbash
1st Attempt


Parts Used: AMT Enterprise, AMT Enterprise Refit, Sheet Styrene
This was one of my most ambitious builds at the time. I had never scratch built parts or heavily modified an existing kit to this level before.
To ensure size compatibility across the board, I would hold up my saucer section to a picture on my iPad, resize the picture to be the same size and then eyeball the other parts to that picture.
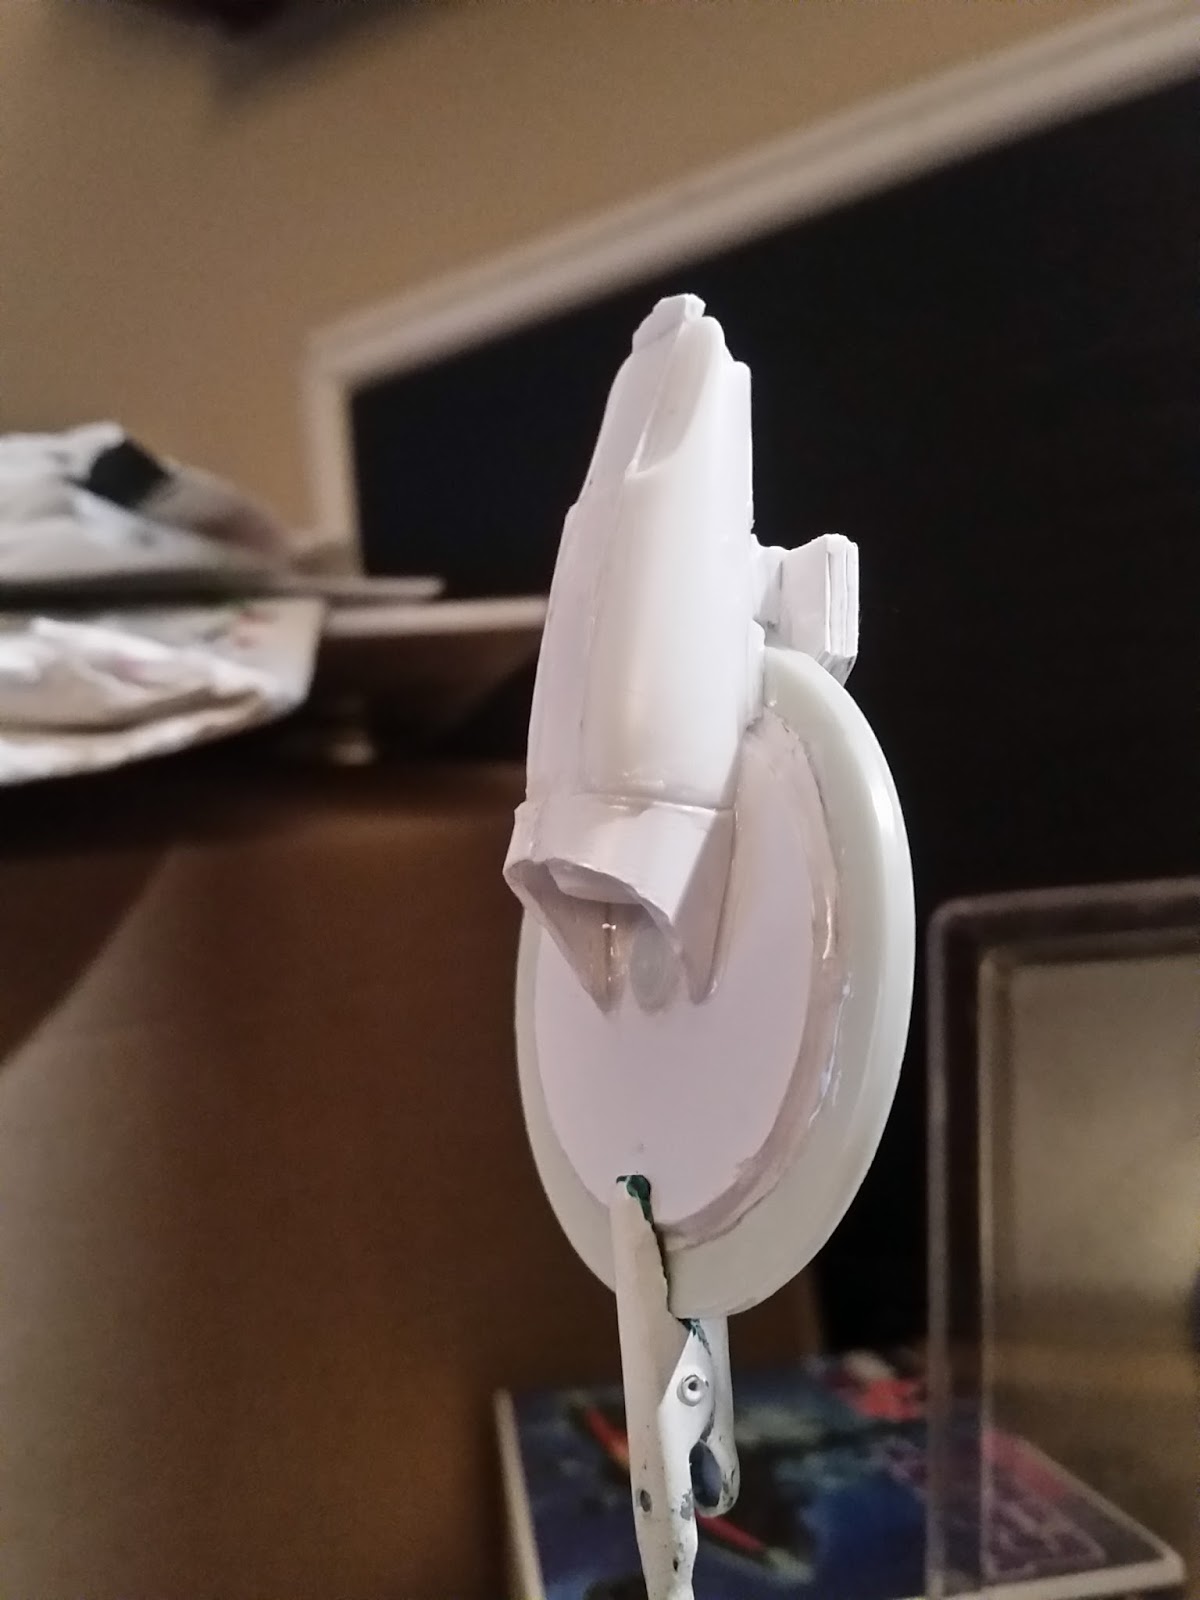
The first thing I needed to do was to smooth out the bottom of the saucer section. The pictures show her to be flat and not so curvy as a Constitution Class. It looks like I'll need to add another layer on the bottom. I also started blocking out the top of the saucer with the sheet sytrene.


I have come to the conclusion that bending and super gluing styrene sucks. You guys who work with this stuff all the time are gods in my eyes. I got the flaring done around the deflector dish and curved out the rear end of the ship. I had to dremmel around the deflector dish to get the flaring to go flush with the hull. My flaring is sticking down to much on the deflector dish as well. If you plan to attempt this ship, mount the secondary hull back a tiny bit more. At this point, I will let the glue set for the night and then take a Dremmel to both ends to round them off.


I will then need to figure out the hanger bay, and I will have lots of sanding to take off the finger prints that have been permanently glued to the ship.


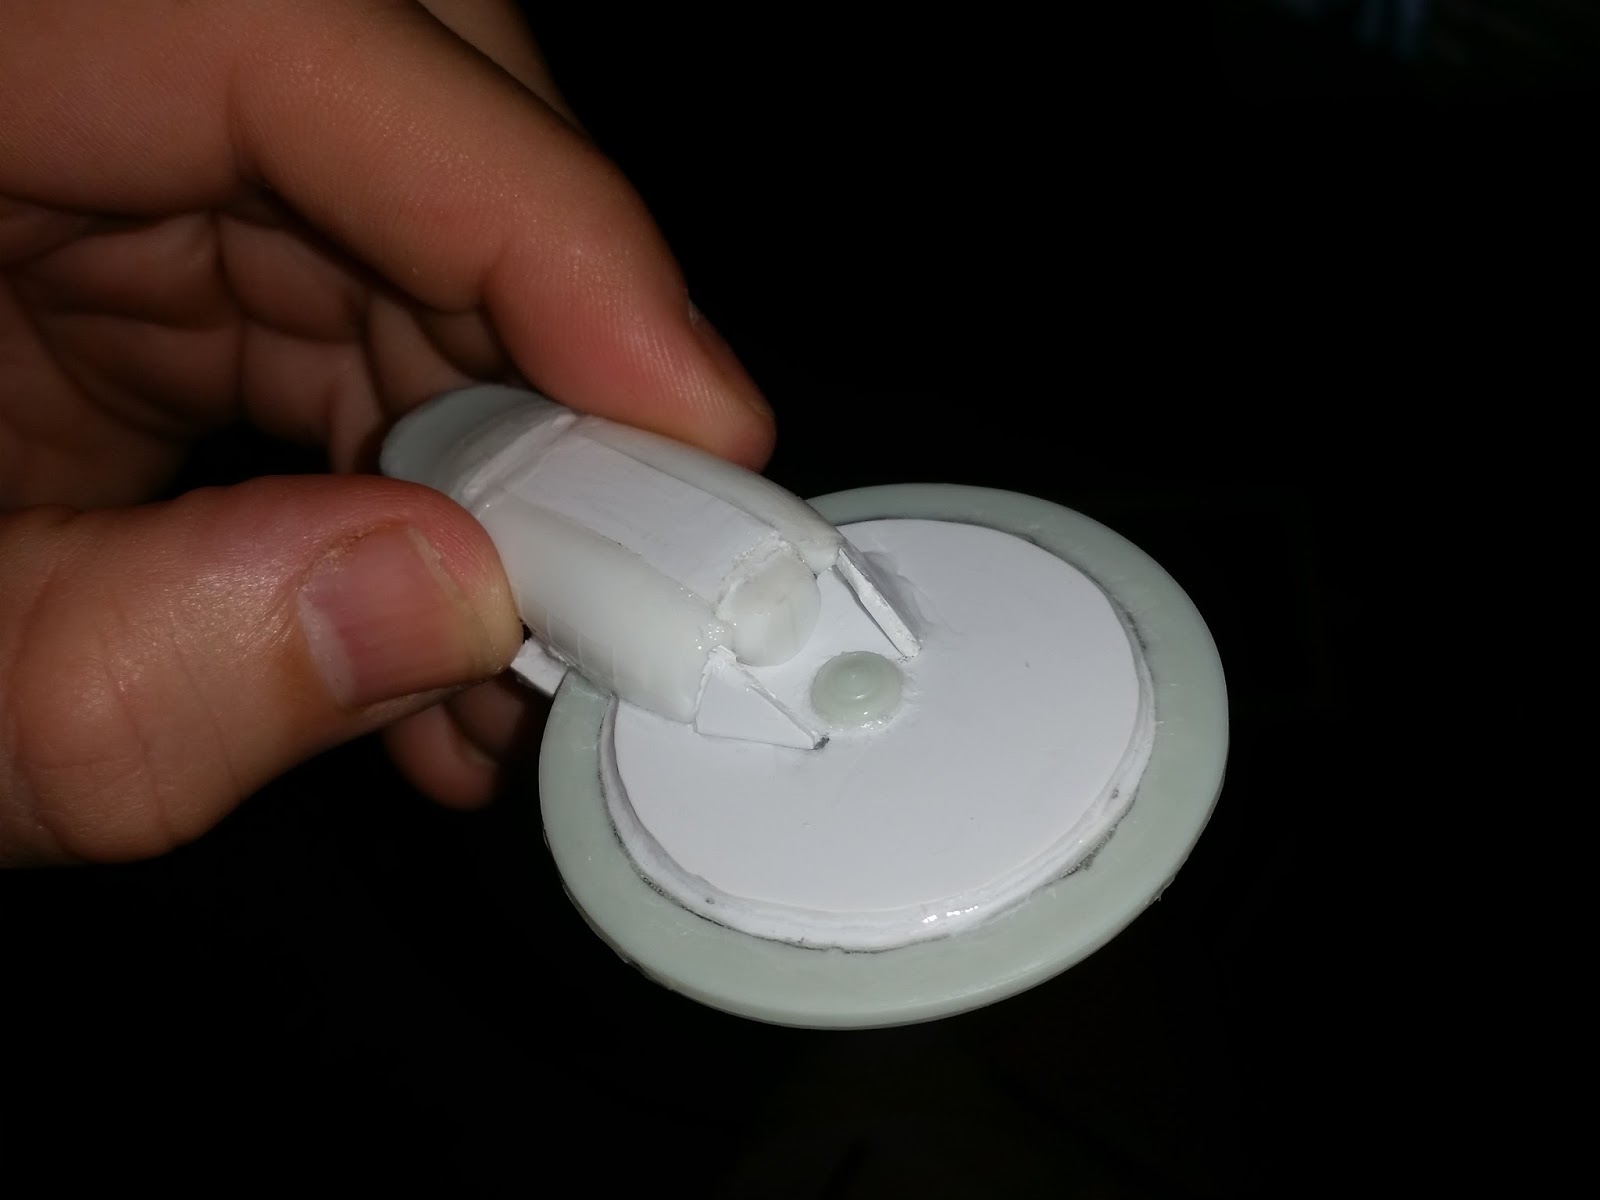
At this point in the build, I wasn't liking the look of the hull around the deflector dish. I tore off the styrene, dremmeled out the rough pieces and then fashioned some new parts. These look much better.


The next phase of the build involved rounding out all the edges with a Dremmel, and this went extremely well. I sanded everywhere as well as I could. Given that this was my first try at curving sheet styrene and super gluing it, I was happy with the end result. I then moved ahead with painting and filling cracks that I didn't notice. I even put some extra special effects into the bussard collectors. This model is a little rough around the edges, but has been fun doing something completely new.


Having just finished the v1 of this ship, and having learned a TON of tricks and techniques, I decided to move ahead and build v2.
USS Ares (NCC-1650)
Ares Class
1:2500 Scale AMT Kitbash
2nd Attempt


As you can see, this model came out a LOT nicer than the first one and I ended up submitting pictures of this one for the contest.
I ended up giving the 1st version to my youngest nephew as a birthday present. From what I understand, it suffered a devastating systems failure after it was accidentally sat on.
I ended up giving the 1st version to my youngest nephew as a birthday present. From what I understand, it suffered a devastating systems failure after it was accidentally sat on.
This time around, I made some paper templates for using the 1:2500 scale parts that I was using so that I could do better on making more exact custom parts. I was able to cut out certain areas of the ship and lay it on the sheet styrene to allow me to trace and cut more exacting sized and shaped parts.
I downloaded a picture of the Ares from the web and then put that picture into a Word document. I resized the picture so that when I printed it out, the saucer on the picture matched the size of my old school Constitution saucer section.
If you would like a copy of the template I made, simply click on THIS LINK.
I didn't really document my step by step process the second time around, however, I did start using a tip on the end of my model cement tube to better control the flow of glue.
The work on the underside of the saucer section went very smoothly this time around using the dremmel to cut out the bottom. It turns out that the inside spindle from a standard scotch tape dispenser makes for a great circle template for your sheet styrene.


Using my template, I cut out the back plate that sits on the rear of the saucer section. This time round though, I used a refit Constitution hull that had the panel lines as I felt that this gave the side of the ship a bit more definition. I sawed off the neck and deflector dish from the secondary hull and prepped all my parts.


I then cut out the space for the deflector dish and then it was a matter of filling gaps, putty work, cutting out the flares for the dish, more dremmel work, more filling gaps, etc., etc., etc.


And then on to the painting. The paint helps see where you need to fill in more gaps so it was a slower job at this point. I even used my scotch tape roll as a template to evenly place the phaser banks.


The end product turned out super nice. I still go back to it and like to show it off as it marked a new era in my model building skill sets.
BONUS ROUND!!!
Every once in a while, I'll have a little extra stuff to share with you that sort of fits in with my comparison articles.
Whenever I build a TOS era style ship, I will inevitably build a TMP era version of that ship as well. Given the availability of 1:2500 parts to me, this is an easy task to imagine and then upgrade. I eventually came across some pictures that someone made up of what the ship would look like and used those pictures as a template to build my own version.


As always, I hope you found this article useful and informative. If you have any questions, comments or suggestions, please feel free to comment below.
So for now, "Live long and prosper!!!"
Additional Links To Photos Of My Collection:
AMT Kitbash v1 (The Model Work In Progress )
AMT Kitbash v2 (The Model Work In Progress )
Contest Photo Shoot
Comparative Pictures
AMT Kitbash v2 (The Model Work In Progress )
Contest Photo Shoot
Comparative Pictures
Looks good! I'm really torn myself about the Ares. I absolutely love it from certain oblique angles (like the spacedock one you have at the top of the post) and but it drops down to just ok on others (like pure side shots). I'm not sure why though.
ReplyDeleteThanks! As a kitbasher, I'm always looking for new an interesting models. To my knowledge, I'm the only person who built one in 1:2500 scale.
DeleteIf you really want to be the only person (or at least the first person until I get around to it!) to build a model at any scale, you can feel free to kitbash one of your NX models to include my NXL module. I wouldn't mind seeing it built! :) That's what I was brainstorming when I found your NX blog article.
ReplyDeletehttp://sitzkrieg.blogspot.com/2016/07/star-trek-nxl-long-range-exploration-pod.html
OK, I have to admit, that is pretty cool. I may take you up on that and one day pick up another Johnny Lighting NX to try it on.
Delete